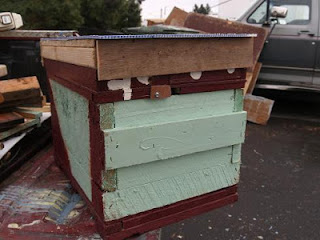
Top covers made easy!
A top cover or weather cover serves
two purposes for a honey bee hive. It provides a way of keeping the
entire hive dry by shedding water away from the kit. The second
purpose is to insulate the hive to slow down nightly heat loss from
the colony. As the weather warms up in the summer, you can tip up
the top cover cover to allow air flow from the screened inner cover
to move up through the hive. This ventilation is critical to keeping
the hive cool and comfortable for your bees. Comfortable bees are
productive bees. We all want that!
 The first picture shows a simple piece
of OSB scrap that I have trimmed with my table saw to fit my 8 frame
equipment. Roughly 14 inches by 20 inches.
I find 2X4 scraps everywhere, so the
price is right. Simply cut these to fit around the perimeter of the
OSB sheet.
Turn the sheet over and place your 2X4
blocks where they are supposed to fit. Nail em with your air stapler
gun. I use 2 inch stables that have a ½ inch crown. These work the
best for me.
The top cover has a piece of corrugated
plastic that was a political road sign. With this year's election,
there was quit a bit of this to be found. What a mess. I simply
clean it up by collecting these after the election and ripped them on
my saw to fit my equipment. Water proof and a bit insulating, these
were a great no-cost part of this construction!
Using roofing or siding nails (with a
big nail head) simply nail the plastic cover to the wood frame to
protect it. Now it is ready to paint and be deployed. It is pretty
heavy and will not blow off in a strong wind. It weighs about 4 lbs as it is but you could put a brick or heavy rock on top if you get gale force
winds in your yard.
The cover 'telescopes' on only two
sides. This way, I can push my hives together in the early spring to
help them warm each other. If it was fully 'telescoping' there would
be air gaps between the hives and would not be helpful in the winter
or early spring.
Cheap and easy to build. Hive equipment doesn't need to cost a fortune. Just a bit of your time, tools and technique, anyone can make this kit in very little time. Next week - an observation hive built for student viewing!


No comments:
Post a Comment